

Github Actions - AWS & NodeJS
Github Actions is a powerful tool for automating parts of your workload and I have been a big fan of it since it was first announced because of my heavy use of Github throughout my career. Now that I have been using Github Actions in a variety of projects I wanted to share how I have some of my scripts setup and provide an explanation for each step to help newcomers to the platform better understand how to use it.
You may think Github Actions is only useful for automatically deploying your code but there's so much more to it - you can run nearly anything on an isolated machine that has a copy of your codebase. This means you can run tests, setup mock databases and even run scripts within your code. Github Actions has many useful plugins to do some crazy things even automatic vulnerability scanning and dependency updating.
Scaffolding
First, let's start this deploy script by creating the proper directory structure and file in the root of our repository. The file has to be located in .github/workflows/ in order for it to get detected and run by Github. In this example, we'll call this file staging.yml - so our directory should look something like this
./
├── .github/
│  └── workflows/
│     └── staging.yml
Now we need some basic meta-data in the begining of our script that tells Github what to call this and when to run it
name: 'Deploy Staging'
on:
  # When there's a push to the `staging` branch, run action
  push:
    branches:
      - staging

  # Same as above, but on pull request, this will make the action
  # run when someone creates a pull request and show the result in
  # the pull request UI
  pull_request:
    branches:
      - staging
The pull_request one here is really useful, it hooks in when someone creates a pull request and provides results right in that UI.

This is useful for making sure that tests pass before merging code with a specific branch which we'll talk about a little later on!
Jobs
Now we're in to the good part, the code that runs each action. There are many ways to do this but I typically just keep everything in one job. We'll call this one backend- "Build & Deploy" since we're talking about NodeJS and tell Github Actions we want this to run in an Ubuntu virtual machine.
jobs:
  backend:
    name: 'Build & Deploy'
    runs-on: ubuntu-latest

    steps:
Now within this job we can define each step. A step is what it sounds like, a part of the job that runs in sequence the way it was written from top down so each step runs one after another until it's completed. It's important to keep this in mind for installing dependencies and setting up scaffolding for our project before running any tests and things like that.
Our first job will use a plugin from the marketplace called actions/checkout to checkout our repository so that we can do work within our repository for the next few tasks. This one is pretty simple, it just brings your repository codebase into the machine that's running this action.
  steps:

    - name: Checkout source code
uses: actions/checkout@v2steps: sectionNow we'll setup NodeJS with another marketplace plugin called actions/setup-node this one's really neat because it allows us to use a cache which will improve install time pretty significantly.
    - uses: actions/setup-node@v2
      with:
        node-version: '18'
        cache: 'npm'
cache-dependency-path: package-lock.jsonnode-version to the version you are using in your projectThis action also supports Yarn with a slightly different configuration
    - uses: actions/setup-node@v2
      with:
        node-version: '18'
        cache: 'yarn'
cache-dependency-path: yarn.locknode-version to the version you are using in your projectTesting
Now that we have our codebase on the machine and Node is installed we can start running some code! In auto deploy scripts I like to first install dependencies, and then move in to seeding and other scaffolding before running tests so the next step is to install dependencies - which also supports both NodeJS and Yarn, in fact it can be any command that you would use on a Ubuntu machine.
    - name: Install dependencies
      run: npm ci
In this example i'm using npm ci which means "clean install" and is typically used in these automated scripts.
This command is similar to npm install, except it's meant to be used in automated environments such as test platforms, continuous integration, and deployment -- or any situation where you want to make sure you're doing a clean install of your dependencies.The next couple steps really depend on your environment but the overall gist is setting up anything that you need in order for your project to run properly especially for automated testing. In this example i'll show a real world use case which is installing MongoDB and setting up mock data that we can then use in our tests in the next steps. There's a great Github Actions plugin called supercharge/mongodb-github-action that installs and sets up MongoDB in the Github Actions machine automatically so we can just connect to it without having to worry about configuration and since this instance is only running during our tests and will only contain mock data we don't really need to worry about security of the configuration and things of that nature.
    - name: Start MongoDB
      uses: supercharge/mongodb-github-action@1.7.0
      with:
        mongodb-version: '5.0'
Now that MongoDB is setup, we can run a script in our code that seeds data to the database. This type of script is out of the scope of this article but typically you would write a simple Javascript file that can be run in NodeJS that creates some random mock data (ie. using Faker) and then add that script to your scripts section of package.json something like this:
{
  "scripts": {
    "start": "node index.js",
    "seed": "node tools/seed.js",
    "test": "NODE_ENV='test' mocha --exit"
  },
}
Adding it to your scripts section is optional but it makes using the script a little bit easier and makes the script more visible to other people working on the project which is always nice!
Running this in Github Actions is super simple, since it's essentially running a command you can run it just like you would on your local machine. Note that we're introducing enviornment variables here to tell our script how to connect to the database we've just setup. Using enviornment variables is another cool and useful part of Github Actions, think of this as an .env file if you're used to using those.
    - name: Seed Data
      run: npm run seed
      env:
        DATABASE: mongodb://127.0.0.1:27017/OurProject
The supercharge/mongodb-github-action has setup a local MongoDB instance that we can connect to as if it were on our local machine at 127.0.0.1:27017 so we tell Github Actions to run the command npm run seed with the DATABASE enviornment variable set to mongodb://127.0.0.1:27017/OurProject this would look something like this on a standard Ubuntu terminal:
DATABASE=mongodb://127.0.0.1:27017/OurProject npm run seedNow that we have a database setup and seeded with mock data let's run some tests! Running tests within the Github Action is a great way to ensure that tests pass when pull requests are made like the screenshot above. With this you can even setup branch protection rules so that you cannot merge a pull request that doesn't have passing tests. This helps with the code review process a lot because humans are humans and sometimes we miss things in review that may break another feature and fail tests. Using the same method as our seed script we can run our test script and pass any enviornment variables we need into it.
- name: Test Backend
      run: npm test
      env:
        PORT: 4000
        PORT_SOCKET: 7071
        NODE_ENV: test
        DATABASE: mongodb://127.0.0.1:27017/OurProject
Deployment
With our working test script we can stop there and just use these features but as the title states we'll go a bit deeper and deploy our backend to Amazon Web Services (AWS), more specifically we'll deploy the project to an Elastic Beanstalk (EB) environment. For this article i'll assume you're familiar with AWS and already have an Elastic Beanstalk environment setup since we're only discussing Github Actions here.
Now that we're getting into more sensitive information such as keys to your live enviornment in AWS we have to think about security and how we can protect this information. Luckily Github has a really cool feature called "Actions secrets and variables" which can be found in your repository settings. This is a place to store sensitive keys that you need in your Github Actions that cannot be read once set and do not show up in your Github Actions logs.
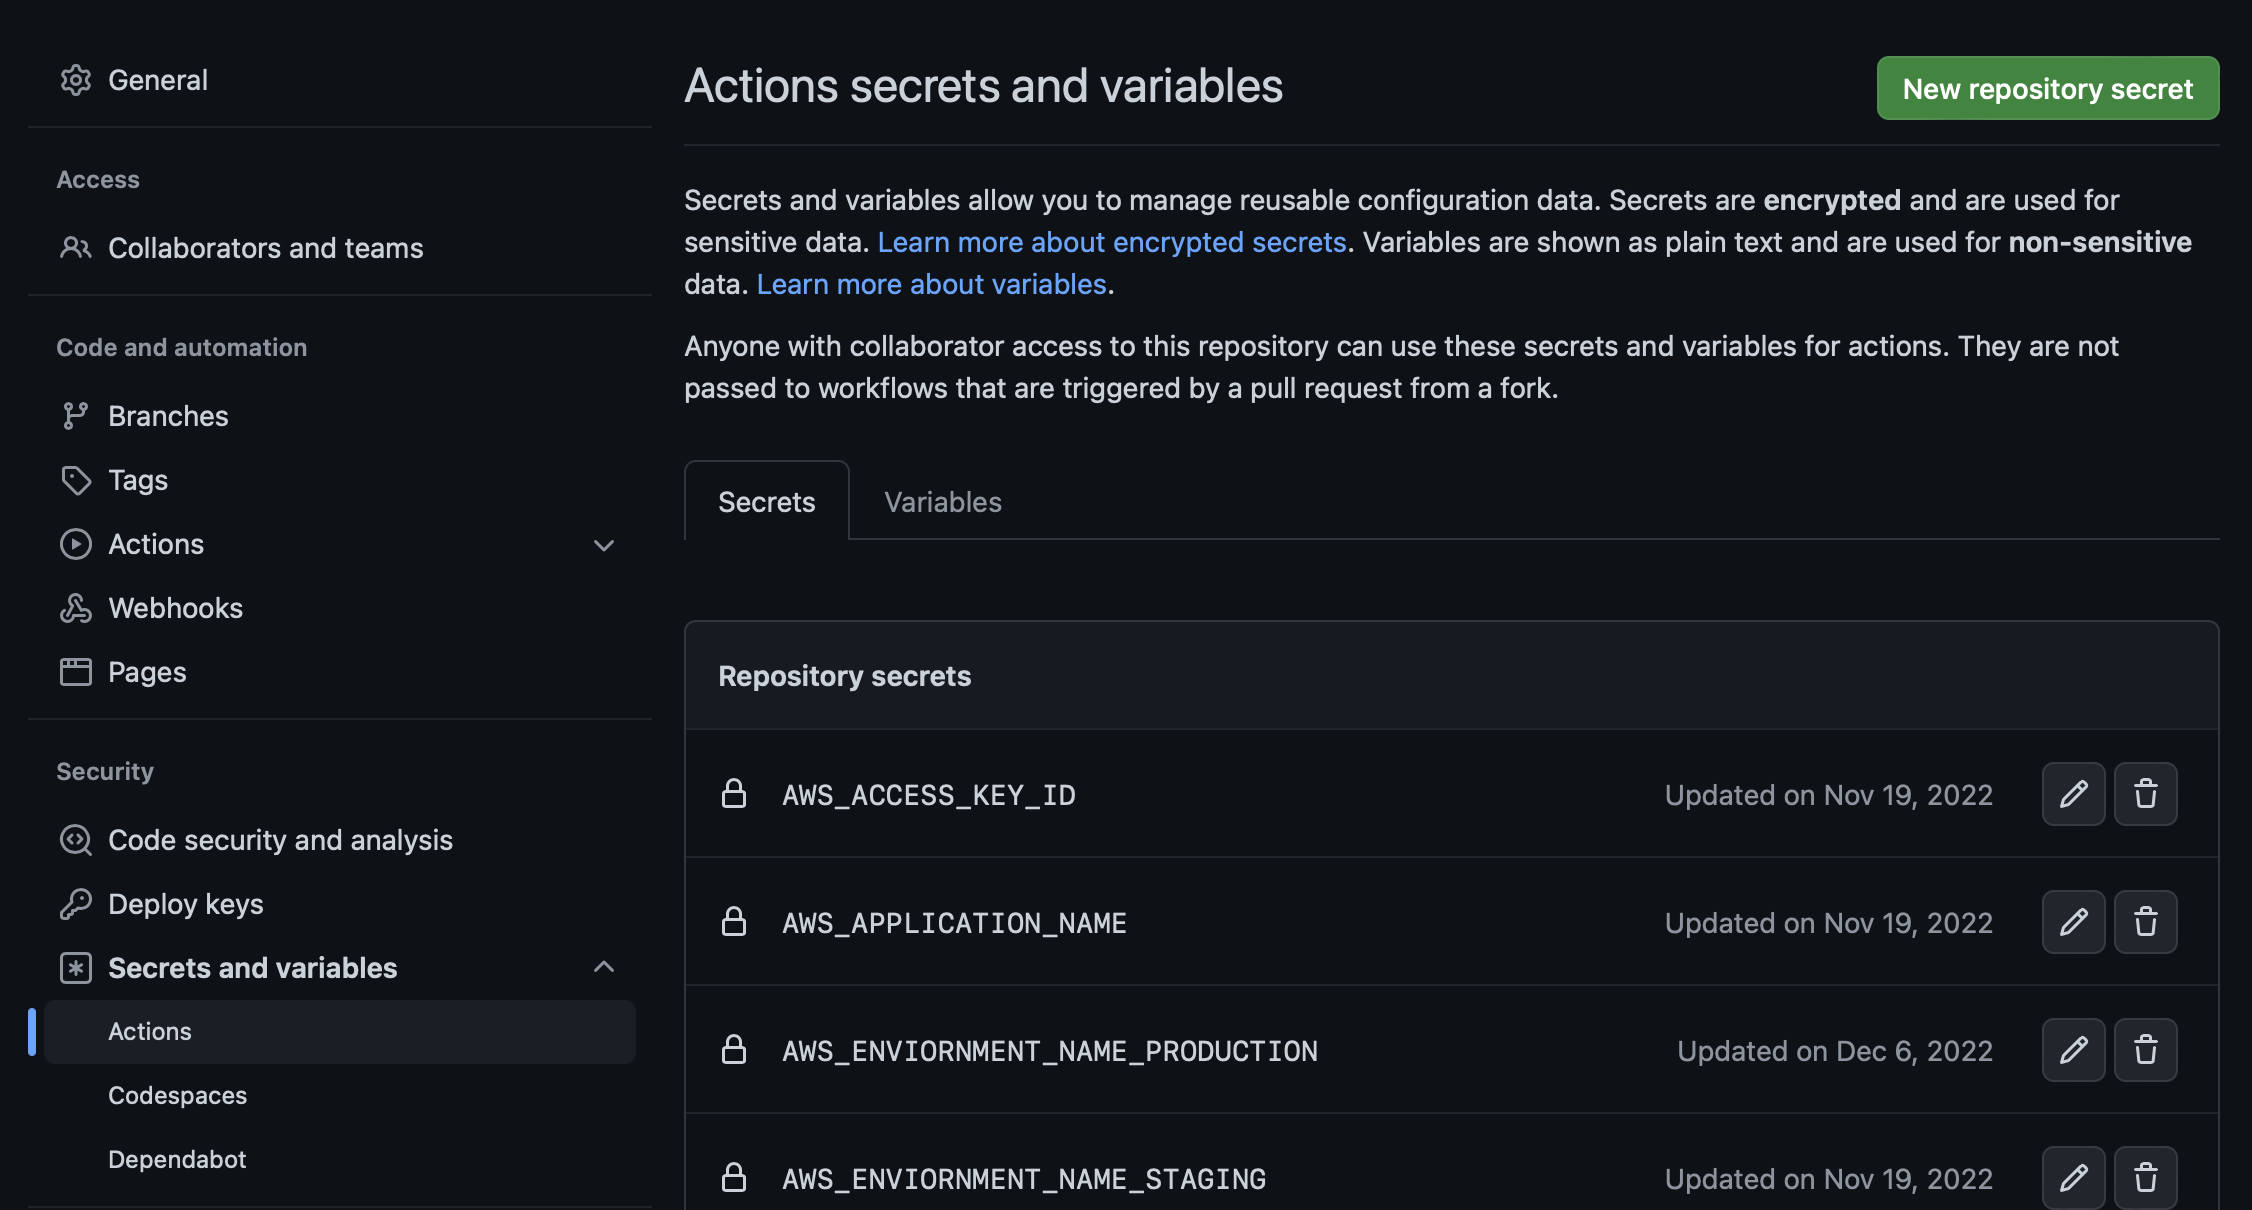
As you can see in the screenshot this sample project has some AWS_ related secrets. In order for AWS deployment to work we have to use some of our access information this is all information you can get from AWS when you set up your environment, so go ahead and create the following secrets in your repository.
AWS_ACCESS_KEY_IDAWS_SECRET_ACCESS_KEYAWS_APPLICATION_NAMEAWS_ENVIORNMENT_NAMEAWS_REGION
Now, in Elastic Beanstalk we use zip files to transfer the project. Basically a zip file containing the entire project is uploaded to Elastic Beanstalk and Elastic Beanstalk unzips the file then runs the project. This means we have to compress the project into a zip file to upload it to Elastic Beanstalk and to do this we simply use the built in zip command that's included with Ubuntu. We'll ignore the .git directory to reduce the overall size of our archive and improve the performance of the action. You can further reduce the complexity by excluding node_modules and using an .ebextension to install them on the remote machine but that's a bit more complex so we'll leave it in for now. We'll also make this step only run if this is a push and not a pull request because we don't want to deploy on every pull request or we may end up with unreviewed code in our staging or production environments.
    - name: Generate deployment package
      if: github.ref == 'refs/heads/main' && github.event_name == 'push'
      run: zip -r deploy.zip . -x '*.git*'
AWS requires a unique version label for each deployment, you could use something like a number but this would break if you deploy more than once so I came up with this quick little version label patch that works pretty well across deployments. Here we're running a command to set an enviornment variable that we'll use in the deployment section. We'll also only do this if we're pushing code since we don't need to deploy for each pull request.
    - name: 'Generate Version Label'
      if: github.ref == 'refs/heads/main' && github.event_name == 'push'
      run: echo VERSION_LABEL=build-main-$(date +%s) >> $GITHUB_ENV
The final step is deploying our codebase to AWS Elastic Beanstalk! There's a really useful plugin called einaregilsson/beanstalk-deploy that makes this process very simple for us. All we have to do is run the plugin with the proper enviornment variables and it does all the work for us. You'll notice that we're pointing to the secrets that we setup before this will inject the secret into the commands enviornment variables so it's important to use a trusted plugin like this one that's open source and you can look at what is happening under the hood. We're also using the VERSION_LABEL variable we created before and telling the action to upload the deploy.zip file we created before that.
    - name: Deploy to EB
      if: github.ref == 'refs/heads/main' && github.event_name == 'push'
      uses: einaregilsson/beanstalk-deploy@v20
      with:
        aws_access_key: ${{ secrets.AWS_ACCESS_KEY_ID }}
        aws_secret_key: ${{ secrets.AWS_SECRET_ACCESS_KEY }}
        application_name: ${{ secrets.AWS_APPLICATION_NAME }}
        environment_name: ${{ secrets.AWS_ENVIORNMENT_NAME }}
        version_label: ${{ env.VERSION_LABEL }}
        version_description: ${{ env.VERSION_LABEL }}
        region: ${{ secrets.AWS_REGION }}
        deployment_package: deploy.zip
Final Thoughts
Github Actions is a fantastic feature that helps us keep more of our work within one platform, reducing complexity and the need to learn many different platforms that work together which is always a plus. The way that Github Actions is setup and configured makes it really flexable and we can use it for so many things since we have full access to a virtual machine of our choosing. There's some great examples from Github as well such as CodeQL that can do automated code scanning for vulnerabilities using Github Actions.